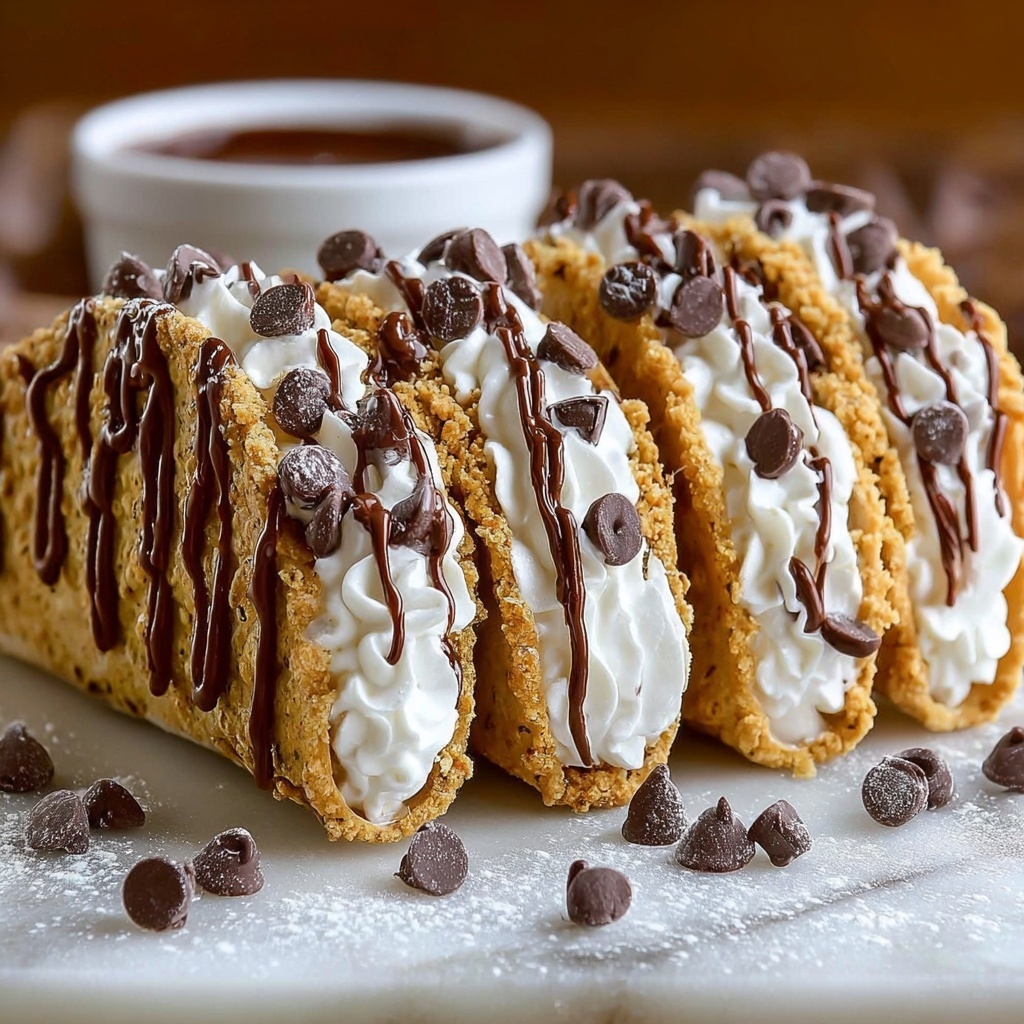
If you are looking for an irresistible treat that combines the best of creamy cheesecake, classic cookie dough, and the playful fun of tacos, you have to try this Cheesecake Cookie Dough Tacos Recipe. It’s a dessert that’s not only visually delightful but also bursts with rich flavors and textures in every bite. The crispy, buttery taco shell coated in graham cracker crumbs wraps around a fluffy cheesecake mousse, studded with chunks of edible cookie dough and mini chocolate chips. Every element plays its part to create a sweet experience that’s both nostalgic and inventive—a real crowd-pleaser for any occasion!
Ingredients You’ll Need
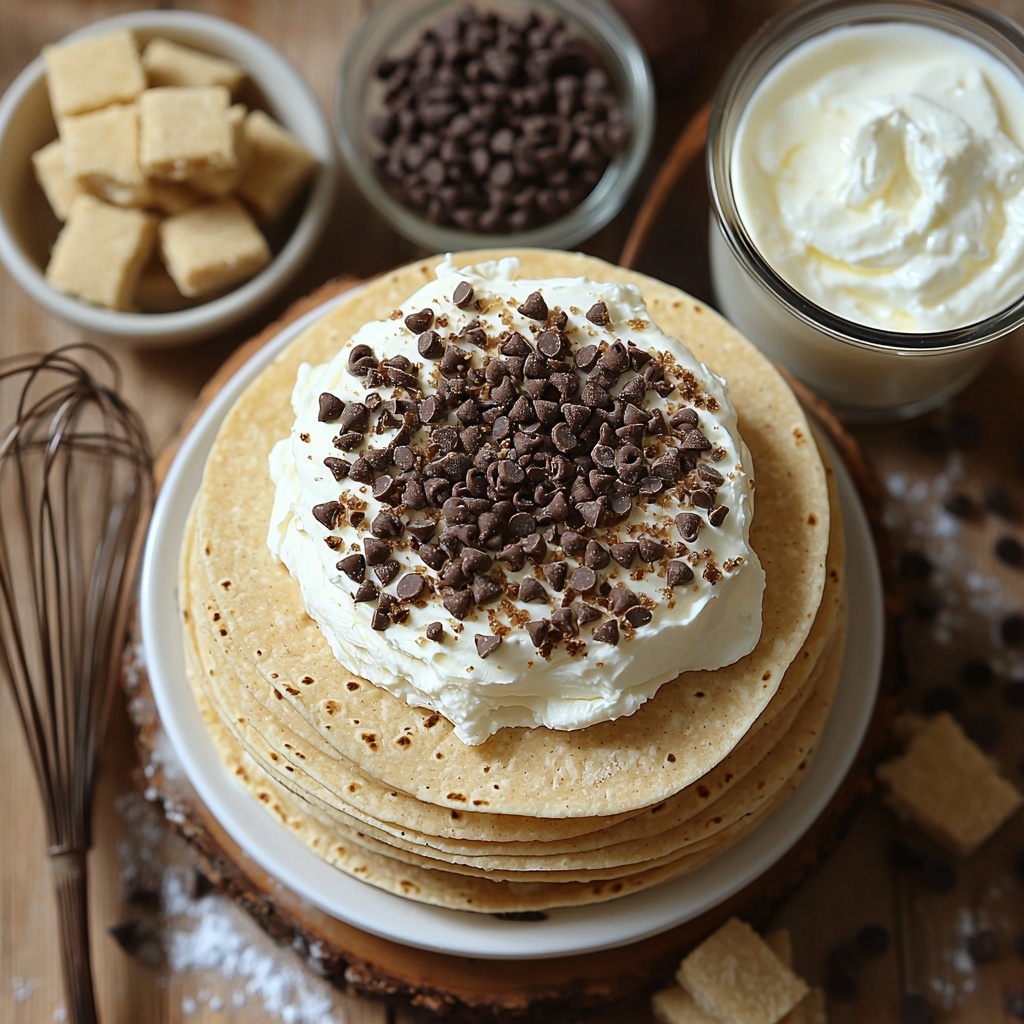
This Cheesecake Cookie Dough Tacos Recipe shines because of its simple yet essential ingredients. Each one plays a crucial role in balancing taste and texture while adding pops of flavor and color that make the dessert sing on your palate.
- Small soft tortilla shells: The perfect base for our taco, pliable enough to shape but sturdy once baked for that satisfying crunch.
- Graham cracker crumbs: Adds sweetness and a delightful, sandy-textured coating on the taco shell.
- Cream cheese, softened: The heart of the cheesecake filling, creating a rich, creamy base.
- Powdered sugar: Sweetens the filling smoothly without any graininess.
- Vanilla extract: Provides warm, aromatic notes to elevate the cheesecake mousse.
- Heavy whipping cream: Whipped to create a light, airy texture that keeps the filling from being too dense.
- Mini chocolate chips: Tiny bursts of chocolate that add texture and a touch of bitterness to balance the sweetness.
- Edible cookie dough, cut into small chunks: The star ingredient that brings nostalgic cookie flavor in every bite.
- Melted butter: Used to coat the taco shells so the graham cracker crumbs stick perfectly and lend extra richness.
How to Make Cheesecake Cookie Dough Tacos Recipe
Step 1: Prep Your Oven and Tortillas
Start by preheating your oven to 375°F (190°C). Next, microwave the tortilla shells for just 10 seconds—this softens them so you can shape your tacos without cracking.
Step 2: Shape and Bake the Taco Shells
Gently fold each tortilla into a taco shape. You can drape them over the bars of an oven rack or use taco molds to hold their shape. Pop them into the oven and bake for 7 to 8 minutes, or until they turn golden and crispy. This step transforms soft tortillas into the perfect crunchy shell for your dessert tacos.
Step 3: Coat and Cool the Shells
While the shells are still warm, brush each one with melted butter. Next, press them into graham cracker crumbs so they get a beautiful, sweet coating on the outside. Let them cool completely; this gives them a firm texture and introduces an irresistible cookie-crust flavor.
Step 4: Make the Cheesecake Mousse
In a mixing bowl, beat the softened cream cheese until smooth and creamy. Then add powdered sugar and vanilla extract, mixing until well combined. In a separate bowl, whip the heavy cream to stiff peaks and gently fold it into your cream cheese mixture. This folding keeps the mousse light and airy—exactly what you want for a dreamy cheesecake filling.
Step 5: Assemble Your Cheesecake Cookie Dough Tacos
Spoon or pipe your luscious cheesecake mousse into the cooled taco shells. Top generously with small chunks of edible cookie dough and a sprinkle of mini chocolate chips for that ultimate cookie-meets-cheesecake goodness.
Step 6: Chill and Set
Pop your assembled tacos in the fridge for at least 30 minutes before serving. This chilling step lets the mousse set beautifully and intensifies all the flavors, creating a refreshing and indulgent dessert.
How to Serve Cheesecake Cookie Dough Tacos Recipe
Garnishes
Feel free to add fresh berries, a drizzle of chocolate or caramel sauce, or even a dusting of powdered sugar on top to elevate your cheesecake cookie dough tacos’ appearance and flavor. Fresh mint leaves can also add a lovely pop of color and a refreshing hint.
Side Dishes
These dessert tacos are rich and flavorful on their own, but pair beautifully with a scoop of vanilla or coffee ice cream. Fresh fruit like sliced strawberries or a small bowl of mixed berries also works wonders to balance the richness with bright, natural sweetness.
Creative Ways to Present
For a fun twist, serve these cheesecake cookie dough tacos on a wooden board lined with parchment paper or in mini taco holders to impress your guests. You can also place them on colorful plates with a dusting of edible glitter or crushed graham crackers to create a festive presentation perfect for parties or celebrations.
Make Ahead and Storage
Storing Leftovers
If you find yourself with leftovers, simply cover the cheesecake cookie dough tacos tightly with plastic wrap or transfer them to an airtight container. Store in the refrigerator for up to 2 days to maintain freshness and texture.
Freezing
For longer storage, you can freeze the assembled tacos without the cookie dough topping to prevent sogginess. Wrap each one carefully in plastic wrap and place in a freezer-safe container. Freeze for up to 1 month. When ready, thaw overnight in the fridge before adding cookie dough chunks and serving.
Reheating
Since these tacos are best served chilled, reheating is not recommended. Instead, allow them to come to a cool room temperature if they’ve been chilled too long, then enjoy the soft yet crunchy contrast of the shells and creamy mousse filling.
FAQs
Can I use regular cookie dough instead of edible cookie dough?
It’s important to use edible cookie dough that is safe to eat raw because regular cookie dough may contain raw eggs or flour that aren’t safe to consume without cooking. Edible cookie dough is specially made to be delicious and safe in this no-bake recipe.
Can I make the taco shells ahead of time?
Absolutely! You can bake and coat the taco shells in graham cracker crumbs a day ahead and store them in an airtight container. This helps save time on the day you want to assemble and serve your Cheesecake Cookie Dough Tacos Recipe.
What if I don’t have mini chocolate chips? Can I substitute them?
You can use regular chocolate chips broken into smaller pieces, chocolate chunks, or even sprinkles for a fun twist. Just keep in mind the mini chocolate chips provide small bursts of chocolate that complement the other textures nicely.
Is there a dairy-free version of this recipe?
This version relies heavily on dairy for its creamy texture and taste. However, you could experiment with dairy-free cream cheese and non-dairy whipped cream alternatives, but results may vary and won’t have the same richness of the classic recipe.
How long does the cheesecake mousse filling keep its texture?
The cheesecake mousse stays wonderfully light and creamy for up to 2 days when refrigerated. Beyond this, the texture may start to change, so enjoy your dessert within this timeframe for the best experience.
Final Thoughts
This Cheesecake Cookie Dough Tacos Recipe is pure joy on a plate and absolutely worth every minute it takes to make. It’s playful yet elegant, crunchy yet creamy, and bursting with flavor from start to finish. Whether you’re treating yourself or impressing friends, it’s guaranteed to steal the spotlight at any dessert table. So go ahead—give it a try and watch those smiles grow with every bite!
Print
Cheesecake Cookie Dough Tacos Recipe
- Prep Time: 25 minutes
- Cook Time: 8 minutes
- Total Time: 33 minutes
- Yield: 6 dessert tacos
- Category: Dessert
- Method: Baking
- Cuisine: American
Description
Delight in these Cheesecake Cookie Dough Tacos, a fun and indulgent dessert featuring crispy tortilla shells coated with graham cracker crumbs and filled with a luscious cheesecake mousse. Topped with mini chocolate chips and chunks of edible cookie dough, these dessert tacos combine creamy, crunchy, and sweet flavors for a perfect treat.
Ingredients
Shells and Coating
- 6 small soft tortilla shells
- 1 cup graham cracker crumbs
- 2 tablespoons melted butter (for coating shells)
Cheesecake Filling
- 8 oz cream cheese, softened
- 1 cup powdered sugar
- 1 teaspoon vanilla extract
- 1 cup heavy whipping cream
Toppings
- 1/3 cup mini chocolate chips
- 1/2 cup edible cookie dough, cut into small chunks
Instructions
- Preheat Oven: Preheat your oven to 375°F (190°C) to prepare for baking the taco shells.
- Soften Tortilla Shells: Microwave the tortilla shells for 10 seconds to make them pliable for shaping.
- Shape Shells: Fold each shell into a taco shape and drape them over the bars of an oven rack or place them into taco molds for support during baking.
- Bake Shells: Bake the shaped tortillas for 7–8 minutes, until they become crispy and golden brown.
- Coat Shells: While the shells are still warm, brush or spray them with melted butter, then press each shell into graham cracker crumbs to coat. Allow the shells to cool completely.
- Prepare Cream Cheese: In a mixing bowl, beat the softened cream cheese until smooth and creamy.
- Add Sugar and Vanilla: Mix in the powdered sugar and vanilla extract until the mixture is well combined and creamy.
- Whip Cream: In a separate bowl, whip the heavy cream until stiff peaks form.
- Fold Cream into Cheese Mixture: Gently fold the whipped cream into the cream cheese mixture to create a light and fluffy cheesecake mousse.
- Fill Shells: Spoon or pipe the cheesecake mousse into the prepared taco shells evenly.
- Add Toppings: Garnish each filled taco with chunks of edible cookie dough and mini chocolate chips.
- Chill: Refrigerate the filled tacos for at least 30 minutes before serving to set the filling and enhance flavors.
Notes
- Use soft tortilla shells to ensure easy shaping without cracking.
- Edible cookie dough should be safe to eat raw and free of eggs.
- For crunchier shells, bake an additional 1-2 minutes but watch carefully to prevent burning.
- Chilling time can be extended up to 2 hours for a firmer filling.
- Optional: Dust the tacos lightly with powdered sugar before serving for extra sweetness.


