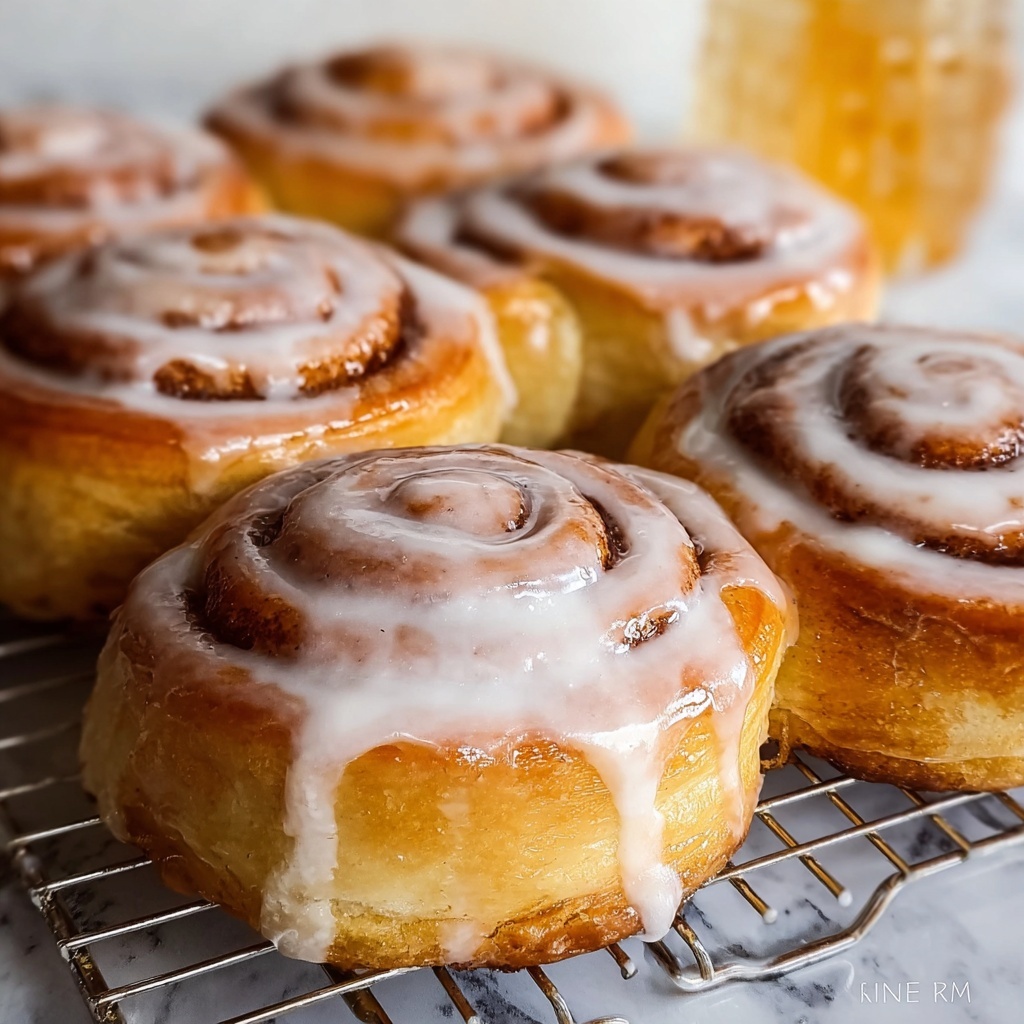
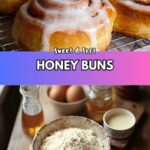
If you’ve ever dreamed of biting into warm, soft, and sweet rolls dripping with luscious glaze, then this Homemade Honey Buns Recipe is your new best friend in the kitchen. This delightful treat combines fluffy, tender dough with a cinnamon-sugar swirl, finished off with a rich honey-infused glaze that will make every bite feel like a comforting hug. Whether it’s for a weekend brunch or a special occasion, these honey buns are surprisingly simple to make and sure to become a favorite in your recipe collection.

Ingredients You’ll Need
Getting the ingredients together for this Homemade Honey Buns Recipe is a breeze, but each one is crucial for creating the perfect texture, flavor, and beautiful golden color. From the yeast that makes the dough fluffy to the honey that brings a natural sweetness, these simple pantry staples come together magically.
- 3 cups all-purpose flour: Provides the structure and chewiness of the dough.
- 3 tablespoons granulated sugar: Adds a touch of sweetness to balance the honey.
- 1 tablespoon instant yeast: Ensures the dough rises beautifully, giving that soft, airy texture.
- 1/2 teaspoon salt: Enhances all flavors and balances the sweetness.
- 1/2 cup warm water (105°F-115°F): Activates the yeast and helps mix the dough.
- 1/3 cup honey: The star ingredient, bringing natural sweetness and moisture to the buns.
- 1 large egg: Adds richness and binds the ingredients together.
- 1/4 cup shortening (melted): Makes the dough tender and buttery soft.
- Filling: 1/4 cup granulated sugar, 1 1/2 teaspoons cinnamon: Creates the irresistible cinnamon swirl inside each bun.
- Glaze: 4 2/3 cups powdered sugar, 2 1/2 tablespoons honey, 1 tablespoon melted butter, 1/2 teaspoon vanilla extract: The luscious topping that gives honey buns their signature glossy sweetness.
How to Make Homemade Honey Buns Recipe
Step 1: Mix Dry Ingredients
Start by whisking together the flour, sugar, yeast, and salt in a large mixing bowl. This step ensures that the yeast is evenly distributed and your dough will rise evenly without any clumps.
Step 2: Combine Wet Ingredients
In another bowl, stir together the warm water, honey, egg, and vanilla extract until smooth. Then, add the melted shortening to this liquid mixture, which will keep your dough tender and soft.
Step 3: Bring It All Together
Slowly combine your wet ingredients with the dry ones using a stand mixer on low speed. This gentle mixing will help the ingredients start to come together without overworking the dough.
Step 4: Knead and Rise
Now it’s time to knead the dough! For about 8 minutes, knead until it’s smooth and elastic. Then place it in a lightly oiled bowl, cover it, and let it rise in a warm spot until it doubles in size, about 1 to 2 hours. This rise is what gives honey buns their fluffy, airy texture.
Step 5: Prepare the Filling
Mix the granulated sugar and cinnamon in a small bowl—it’s such a simple combo but the flavor inside the buns is where the magic happens.
Step 6: Roll, Fill, and Shape
Once your dough has risen, roll it out into a large rectangle on a floured surface. Sprinkle your cinnamon-sugar filling evenly over the dough, then carefully roll it up tightly like a jelly roll. Slice into individual buns—these spiraled slices are the iconic shape of homemade honey buns.
Step 7: Second Rise
Place the buns on parchment-lined baking sheets and let them rise again for about 45 minutes. This step ensures that delightful fluffiness before cooking.
Step 8: Cook the Buns
You can choose to fry or bake these buns. Baking at 350°F until they turn golden brown is an easier, less oily method that still yields an incredible texture and flavor. Frying will give you a crispy exterior with a soft inside—a deliciously indulgent choice.
How to Serve Homemade Honey Buns Recipe
Garnishes
While the glaze on these honey buns is perfect on its own, you can add a sprinkle of chopped toasted pecans or a dusting of powdered cinnamon on top for extra flair. Fresh fruit on the side or a drizzle of warm caramel sauce can also elevate your presentation and taste.
Side Dishes
These buns pair beautifully with a cup of hot coffee or tea for a cozy breakfast or afternoon snack. If you want a heartier option, serve alongside scrambled eggs or a fresh fruit salad to balance sweetness with something light and refreshing.
Creative Ways to Present
For a fun twist, try serving these honey buns on a tiered cake stand at brunch, or wrap them individually in parchment paper tied with string for gifting. You can even drizzle some extra honey glaze right before serving for that irresistibly sticky finish.
Make Ahead and Storage
Storing Leftovers
If you have leftovers (which is rare!), store them in an airtight container at room temperature for up to 2 days. This keeps them soft and fresh without drying out.
Freezing
Homemade honey buns freeze wonderfully. Wrap them tightly in plastic wrap and place them in a freezer bag. They can be frozen for up to 2 months. When you’re ready, thaw overnight in the fridge or at room temperature.
Reheating
To enjoy your honey buns warm, heat them gently in the oven at 300°F for 5-10 minutes or microwave for 15-20 seconds. You’ll get that freshly-baked feeling all over again with soft dough and gooey glaze.
FAQs
Can I use active dry yeast instead of instant yeast?
Yes! Just be sure to proof the active dry yeast in warm water with a pinch of sugar for about 5-10 minutes before mixing it with the other ingredients to ensure it’s active.
Are these honey buns suitable for freezing before cooking?
You can freeze the shaped buns after the second rise but before baking or frying. Place them on a sheet pan in the freezer and then transfer to a freezer-safe bag. When ready to bake, do so from frozen, adding extra baking time as needed.
What’s the best way to get a sticky glaze that stays put?
Applying the glaze while the buns are still warm helps it seep in and stick beautifully. Using a generous drizzle and allowing it to set at room temperature gives you that perfect sticky shine.
Can I substitute shortening with butter?
Absolutely! Melted butter can be used instead of shortening and will add a richer, buttery flavor, though the dough might be a little less tender.
Is it okay to bake instead of frying? Will it change the texture?
Baking at 350°F until golden provides a lighter, less greasy honey bun but still moist and fluffy inside. Frying produces a crispier crust and richer flavor, so it depends on your preference and convenience.
Final Thoughts
There really is nothing quite like making your own sweet treats from scratch, and this Homemade Honey Buns Recipe is a shining example of how simple ingredients and a little time can turn into pure bliss. Whether you bake or fry, slather on that heavenly glaze, and share with friends and family, these honey buns will warm hearts and satisfy cravings like no other. Give it a try—you’ll soon understand why this recipe holds a special place in so many kitchens.
Print
Homemade Honey Buns Recipe
- Prep Time: 20 minutes
- Cook Time: 20 minutes
- Total Time: 1 hour 45 minutes
- Yield: 12 honey buns
- Category: Baking
- Method: Baking
- Cuisine: American
Description
These homemade honey buns are soft, sweet, and perfectly spiced with cinnamon sugar filling, topped with a luscious honey glaze. Made from scratch with simple ingredients, they offer a delightful breakfast or snack option that’s better than store-bought.
Ingredients
Dough
- 3 cups all-purpose flour
- 3 tablespoons granulated sugar
- 1 tablespoon instant yeast
- 1/2 teaspoon salt
- 1/2 cup warm water (105°F-115°F)
- 1/3 cup honey
- 1 large egg
- 1/4 cup shortening (melted)
Filling
- 1/4 cup granulated sugar
- 1 1/2 teaspoons cinnamon
Glaze
- 4 2/3 cups powdered sugar
- 2 1/2 tablespoons honey
- 1 tablespoon melted butter
- 1/2 teaspoon vanilla extract
Instructions
- Mix dry ingredients: In a mixing bowl, whisk together the all-purpose flour, granulated sugar, instant yeast, and salt thoroughly to prepare your dry mix.
- Combine wet ingredients: In a separate bowl, stir warm water, honey, beaten egg, and vanilla extract until smooth. Then add the melted shortening to this wet mixture and blend well.
- Form dough: Gradually add the wet mixture to the dry ingredients, using a stand mixer on low speed until the dough starts to come together.
- Knead dough: Knead the dough on a floured surface or using the dough hook for about 8 minutes until it becomes smooth and elastic. Place it in an oiled bowl, cover, and let it rise until doubled in size, about 1 to 2 hours.
- Prepare filling: In a small bowl, combine granulated sugar and cinnamon evenly for the filling.
- Shape rolls: Roll the risen dough into a large rectangle. Evenly sprinkle the cinnamon sugar filling over the dough. Roll the dough tightly into a log and cut into individual pieces to form the buns.
- Second rise: Place the cut buns on parchment-lined baking sheets, cover, and let them rise again until puffy, approximately 45 minutes.
- Bake: Preheat the oven to 350°F (175°C). Bake the buns for 15-20 minutes or until golden brown on top.
- Prepare glaze: While the buns bake, whisk together powdered sugar, honey, melted butter, and vanilla extract to create the rich glaze.
- Glaze and serve: Once buns are slightly cooled, drizzle the honey glaze generously over each warm bun. Serve fresh and enjoy your homemade honey buns!
Notes
- Ensure water is warm but not hot to activate yeast properly.
- Shortening can be substituted with unsalted butter melted for richer flavor.
- Allowing the dough to rise adequately ensures fluffy honey buns.
- These buns can be stored in an airtight container for 2-3 days or frozen for longer storage.
- For a healthier option, substitute some all-purpose flour with whole wheat flour.