
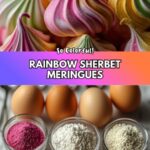
If you have a sweet tooth and love playful, colorful desserts, then you must try this delightful Rainbow Sherbet Meringues Recipe. These airy, crisp meringues capture the joyful spirit of classic rainbow sherbet with vibrant swirls of orange, pink, and green hues. Perfectly light and melt-in-your-mouth, they bring a burst of summer fun to any occasion. Imagine crunchy little clouds of sweetness that not only look stunning but also satisfy your craving for a bright, fruity treat without weighing you down. Once you make these, they’re bound to become your go-to showstopper dessert for parties, gifts, or any time you want a pop of color and cheer in your day.
Ingredients You’ll Need
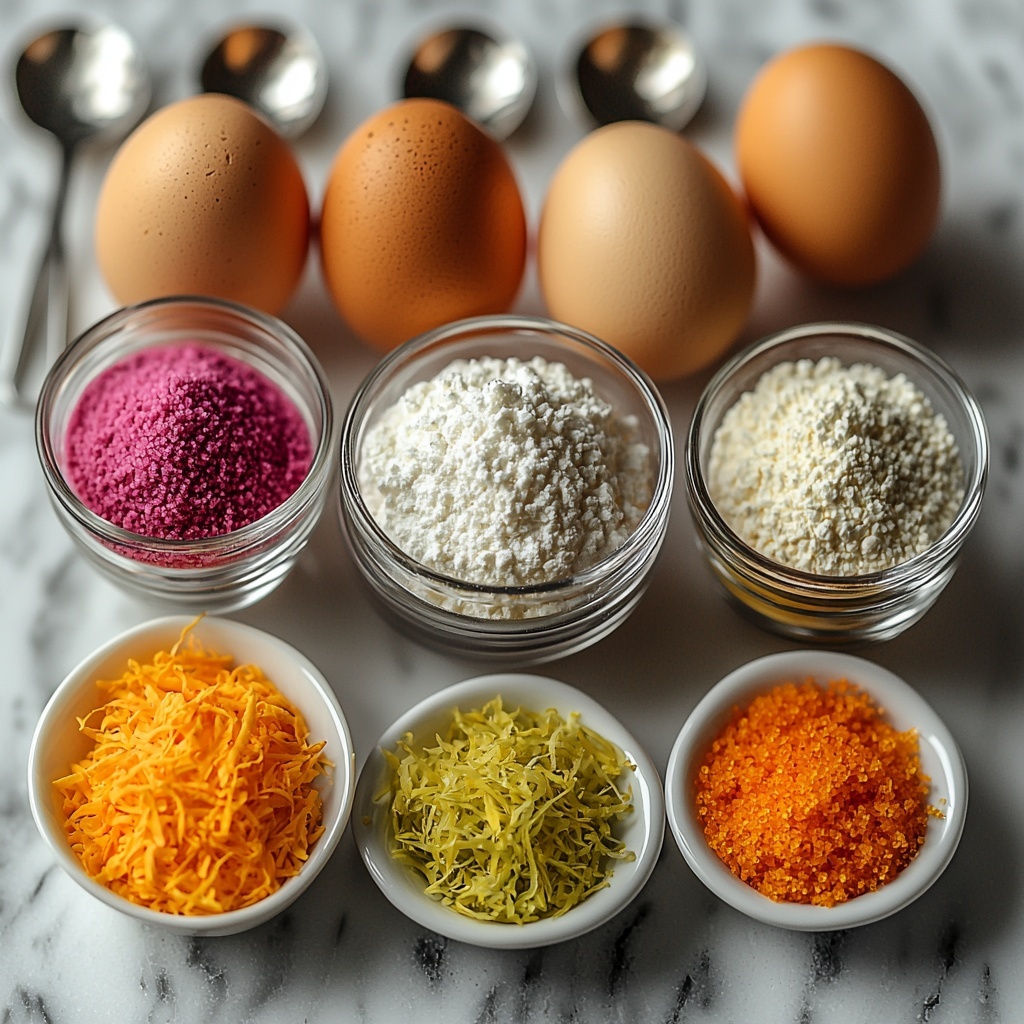
Creating these stunning meringues is easier than you might think! The ingredients are simple yet essential to achieve that perfect fluffy texture, glossy finish, and that trademark sherbet-inspired color pop.
- 4 large egg whites: Ensures that your meringue has a light, airy base that whips up beautifully.
- 1 cup granulated sugar: Adds the necessary sweetness while helping stabilize the meringue.
- ½ teaspoon cream of tartar: Helps the egg whites stiffen and maintain their structure when baked.
- 1 teaspoon vanilla extract: Brings a subtle warmth and depth to balance the tangy colors.
- Gel food coloring in orange, pink, and green: These vibrant colors recreate the classic rainbow sherbet look without diluting the mixture.
- Optional ¼ teaspoon citrus zest (lemon, lime, or orange): Adds a fresh, zesty kick that enhances the sherbet vibe even more.
How to Make Rainbow Sherbet Meringues Recipe
Step 1: Prepare Your Workspace and Ingredients
Start by preheating your oven to 225°F and lining two baking sheets with parchment paper. It’s important the egg whites are at room temperature as this helps them whip up better. Make sure your mixing bowl and beaters are completely clean and dry; any grease or moisture can prevent the whites from whipping properly.
Step 2: Beat the Egg Whites
Using an electric mixer on medium speed, beat the egg whites until they become foamy. Then add the cream of tartar, which stabilizes the mixture and encourages it to hold air. Increase the speed and beat until soft peaks form—meaning when you lift the beaters, the peaks gently fold over.
Step 3: Sweeten and Strengthen the Meringue
Gradually sprinkle in the sugar one tablespoon at a time while beating on high speed. This process, although a bit of patience, is crucial to developing that glossy, stiff meringue texture. Continue beating until the peaks are stiff and shiny—they should stand straight up without drooping.
Step 4: Add Flavor and Divide Colors
Gently fold in the vanilla extract and optional citrus zest for that sherbet zing. Then divide the meringue evenly into three separate bowls. Tint each portion with a small dab of gel food coloring—orange, pink, and green—making sure you don’t add too much to avoid thinning the meringue.
Step 5: Pipe the Colorful Meringues
Using a spatula, spoon alternating stripes of each colored meringue into a piping bag fitted with a star or round tip. This striping effect is how you’ll get those beautiful swirls of rainbow sherbet colors in each delicate cookie. Pipe 1½-inch mounds onto your prepared baking sheets, leaving a little space between each because they will crisp up nicely.
Step 6: Bake and Cool
Bake the meringues at 225°F for 1 hour. Afterward, turn off the oven but let the meringues cool inside for another hour without opening the oven door. This slow cooling helps them dry out perfectly, ensuring they are crisp on the outside with just the right texture inside.
How to Serve Rainbow Sherbet Meringues Recipe
Garnishes
Sprinkle a tiny pinch of edible glitter or finely chopped candied citrus peels on top before baking to add sparkle and extra zing. Fresh berries on the side also complement the fruity sherbet flavors beautifully, making them look even more festive and inviting.
Side Dishes
These meringues pair wonderfully with scoops of vanilla or lemon sorbet for an extra cool, creamy contrast. You can also serve them alongside a tart raspberry sauce or fresh fruit salad to balance their sweetness and amp up the colorful presentation.
Creative Ways to Present
Arrange the meringues stacked in a clear glass jar for a gift that’s as charming as it is delicious. For parties, serve them on a tiered cake stand or scattered over a dessert table for a playful pop of color. Layer them into parfait glasses with whipped cream and fruit for a light, elegant dessert option.
Make Ahead and Storage
Storing Leftovers
Store your Rainbow Sherbet Meringues in an airtight container at room temperature to keep them crisp. Avoid humid environments to prevent them from becoming sticky or chewy. When stored properly, they can last up to a week while maintaining their delightful crunch.
Freezing
These meringues freeze beautifully! Place them in a freezer-safe container separated by parchment paper layers to avoid sticking. When you’re ready to enjoy, thaw them at room temperature slowly to preserve their light texture without condensation forming.
Reheating
Since meringues should stay crisp, reheating is best done by popping them in a low-temperature oven (around 200°F) for 5-10 minutes. This refreshes their crunch without melting or burning the colors.
FAQs
Can I use liquid food coloring instead of gel?
Gel food coloring is recommended because it adds intense color without adding liquid that could deflate the meringue. Using liquid coloring may result in a runnier batter and less stable meringues.
Why did my meringues turn out sticky?
Sticky meringues often result from humidity, underbaking, or not cooling the meringues properly in the oven. Always bake on a dry day if possible, and let them cool fully with the oven door closed to maintain the crispness.
Can I add other flavors?
Absolutely! Feel free to experiment with extracts like almond or coconut or add different zest combinations. Just keep flavors mild so they don’t overpower the delicate sweetness and colors.
What is the best way to pipe multi-colored meringues?
Gently layering stripes of each colored meringue in the piping bag creates the colorful swirls that mimic sherbet. Avoid mixing too much or stirring inside the bag to keep distinct colors visible.
Are these meringues gluten-free?
Yes! Since the recipe uses only egg whites, sugar, and natural flavorings, Rainbow Sherbet Meringues are naturally gluten-free and a great treat for those with gluten sensitivities.
Final Thoughts
There is something truly magical about creating Rainbow Sherbet Meringues Recipe that brings both color and joy to your kitchen. These delicate, airy treats are not only stunning to look at but wonderfully tasty, capturing that nostalgic sherbet flavor in a crisp, bite-sized delight. I can’t wait for you to try them yourself — they’re perfect for sharing with loved ones or brightening up any dessert table. Give this recipe a go, and let the colors and flavors brighten your day!
Print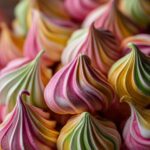
Rainbow Sherbet Meringues Recipe
- Prep Time: 20 minutes
- Cook Time: 1 hour
- Total Time: 2 hours
- Yield: 30 meringues
- Category: Dessert
- Method: Baking
- Cuisine: American
- Diet: Gluten Free
Description
Rainbow Sherbet Meringues are light, airy, and colorful cookies made from whipped egg whites and sugar, tinted with vibrant gel food coloring to mimic the refreshing hues of rainbow sherbet. These gluten-free, delicate treats are perfect for parties, baby showers, or as a unique edible gift, with a crisp exterior and a melt-in-your-mouth texture.
Ingredients
Ingredients
- 4 large egg whites, at room temperature
- 1 cup granulated sugar
- ½ teaspoon cream of tartar
- 1 teaspoon vanilla extract
- Gel food coloring in orange, pink, and green (or colors of your choice to mimic rainbow sherbet)
- Optional: ¼ teaspoon citrus zest (lemon, lime, or orange) for extra flavor
Instructions
- Preheat and Prepare: Preheat the oven to 225°F and line two baking sheets with parchment paper to prevent sticking and allow for easy cleanup.
- Beat Egg Whites: In a clean, dry mixing bowl, beat the egg whites with an electric mixer on medium speed until they become foamy, setting the stage for stable meringue formation.
- Add Cream of Tartar: Add the cream of tartar and continue beating until soft peaks form, which helps stabilize the egg whites and improve volume.
- Incorporate Sugar Gradually: Gradually add the sugar one tablespoon at a time while beating on high speed, continuing until the mixture becomes glossy and forms stiff peaks, ensuring a smooth and firm meringue texture.
- Add Flavorings: Beat in the vanilla extract and optional citrus zest to infuse the meringue with fragrant flavor notes enhancing the sherbet theme.
- Divide and Color: Divide the meringue evenly into three bowls, tint each with a small amount of gel food coloring to achieve vibrant orange, pink, and green colors reminiscent of rainbow sherbet.
- Pipe Meringues: Using a spatula, gently spoon alternating stripes of each colored meringue into a piping bag fitted with a large star or round tip. Pipe 1½-inch mounds onto the prepared baking sheets, spacing them slightly apart to avoid sticking.
- Bake: Bake the meringues in the preheated oven for 1 hour, allowing them to dry and crisp up without browning.
- Cool Slowly: Turn off the oven and let the meringues cool inside for another hour without opening the oven door. This gradual cooling helps prevent cracking and maintains their delicate texture.
- Store: Once completely cool, transfer the meringues to an airtight container to keep them crisp and fresh until serving.
Notes
- Use gel food coloring to avoid thinning the meringue mixture and maintain stiffness.
- Humidity can affect the texture, so it’s best to make these on a dry day for crisp results.
- These vibrant meringues are ideal for festive occasions like parties and baby showers or as a colorful edible gift.

